Santa Stand Reminder
This is a 25 minute “stand” timer. After pressing the button, the green light will turn on. Get in your flow. After 25 minutes the green light will turn off and the red light will turn on. This is your reminder to stand up. There’s no noise, nothing flashing. Stay in your flow if you’re there but if/when you look up and you see red it’s a reminder to stand up and stretch your legs.
Everything you need should be in the box and pending how rough the ride from the North Pole was it should be simple enough to finish assembly.
What’s in the Box:
- 1x Arduino Board (e.g., Arduino Uno)
- 2x LEDs (1 green, 1 red, as bright as Rudolph’s nose!)
- 1x Jolly Push Button
- Resistors:
- 2x 220Ω (blue)
- 1x 1000Ω (beige) (for LEDs and the button)
- 1x Breadboard (no, not the gingerbread type!)
- 1x 9v Battery and leads
- Handful of jumpers
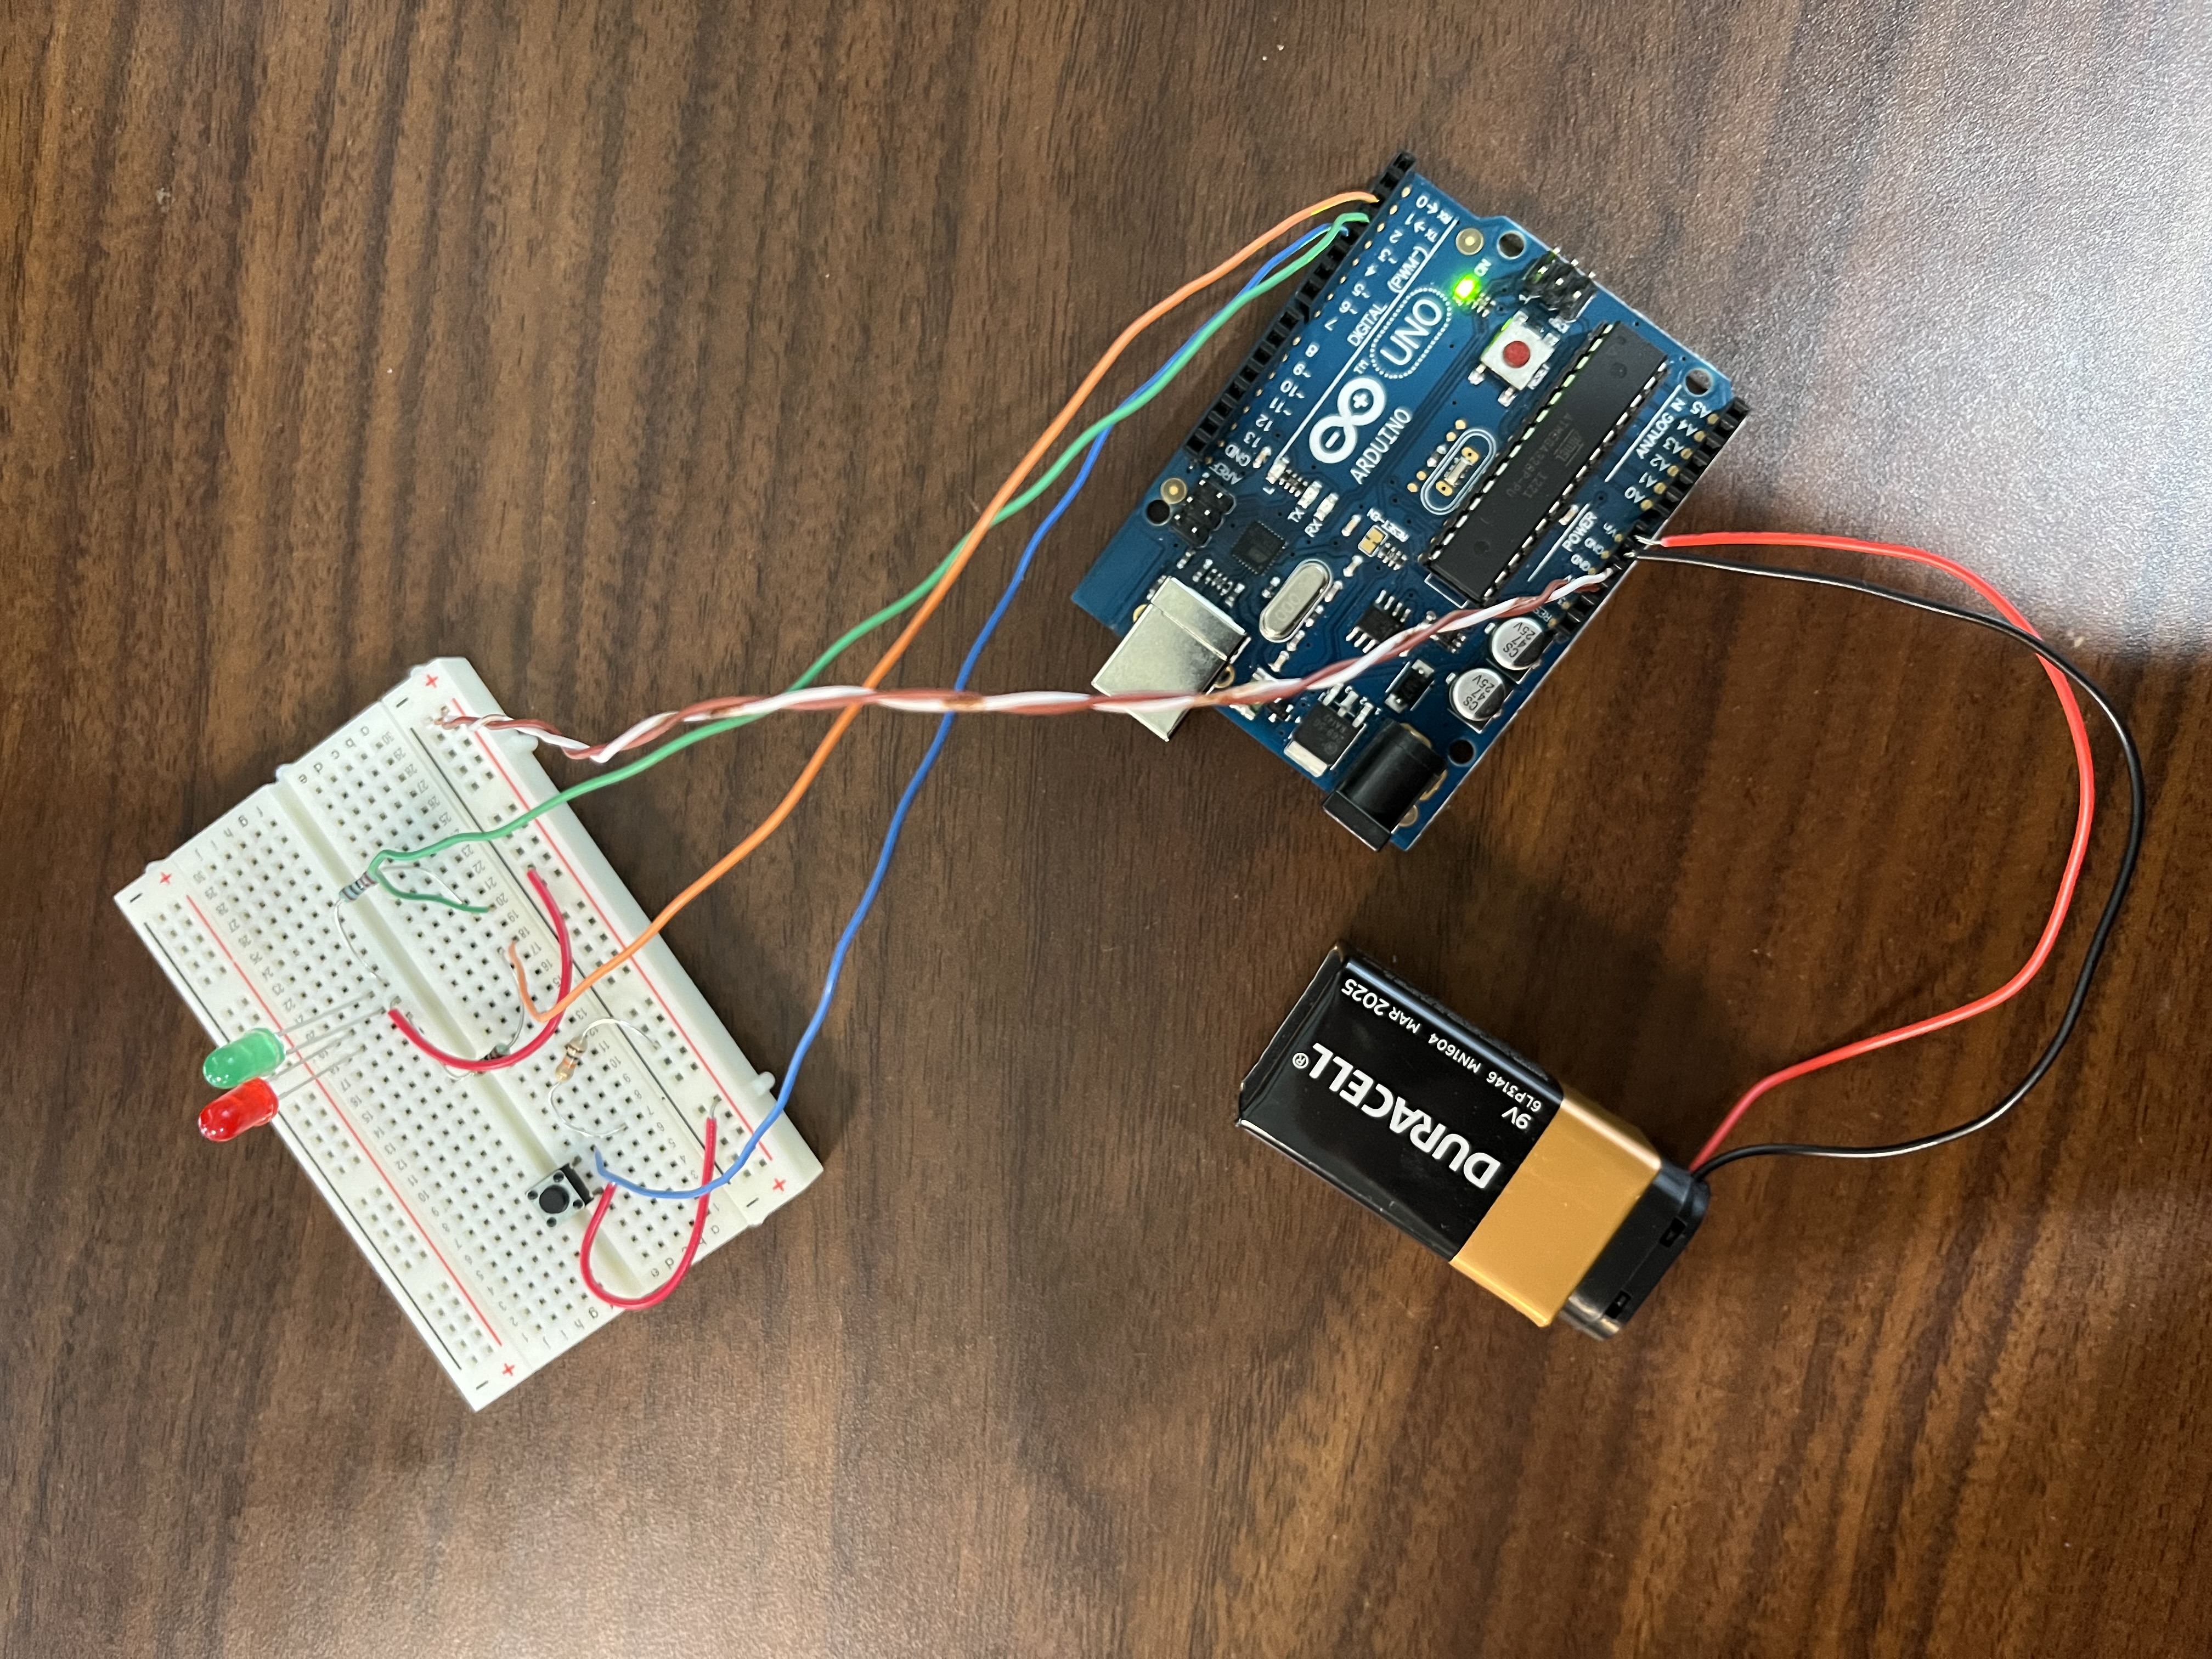
Assembly
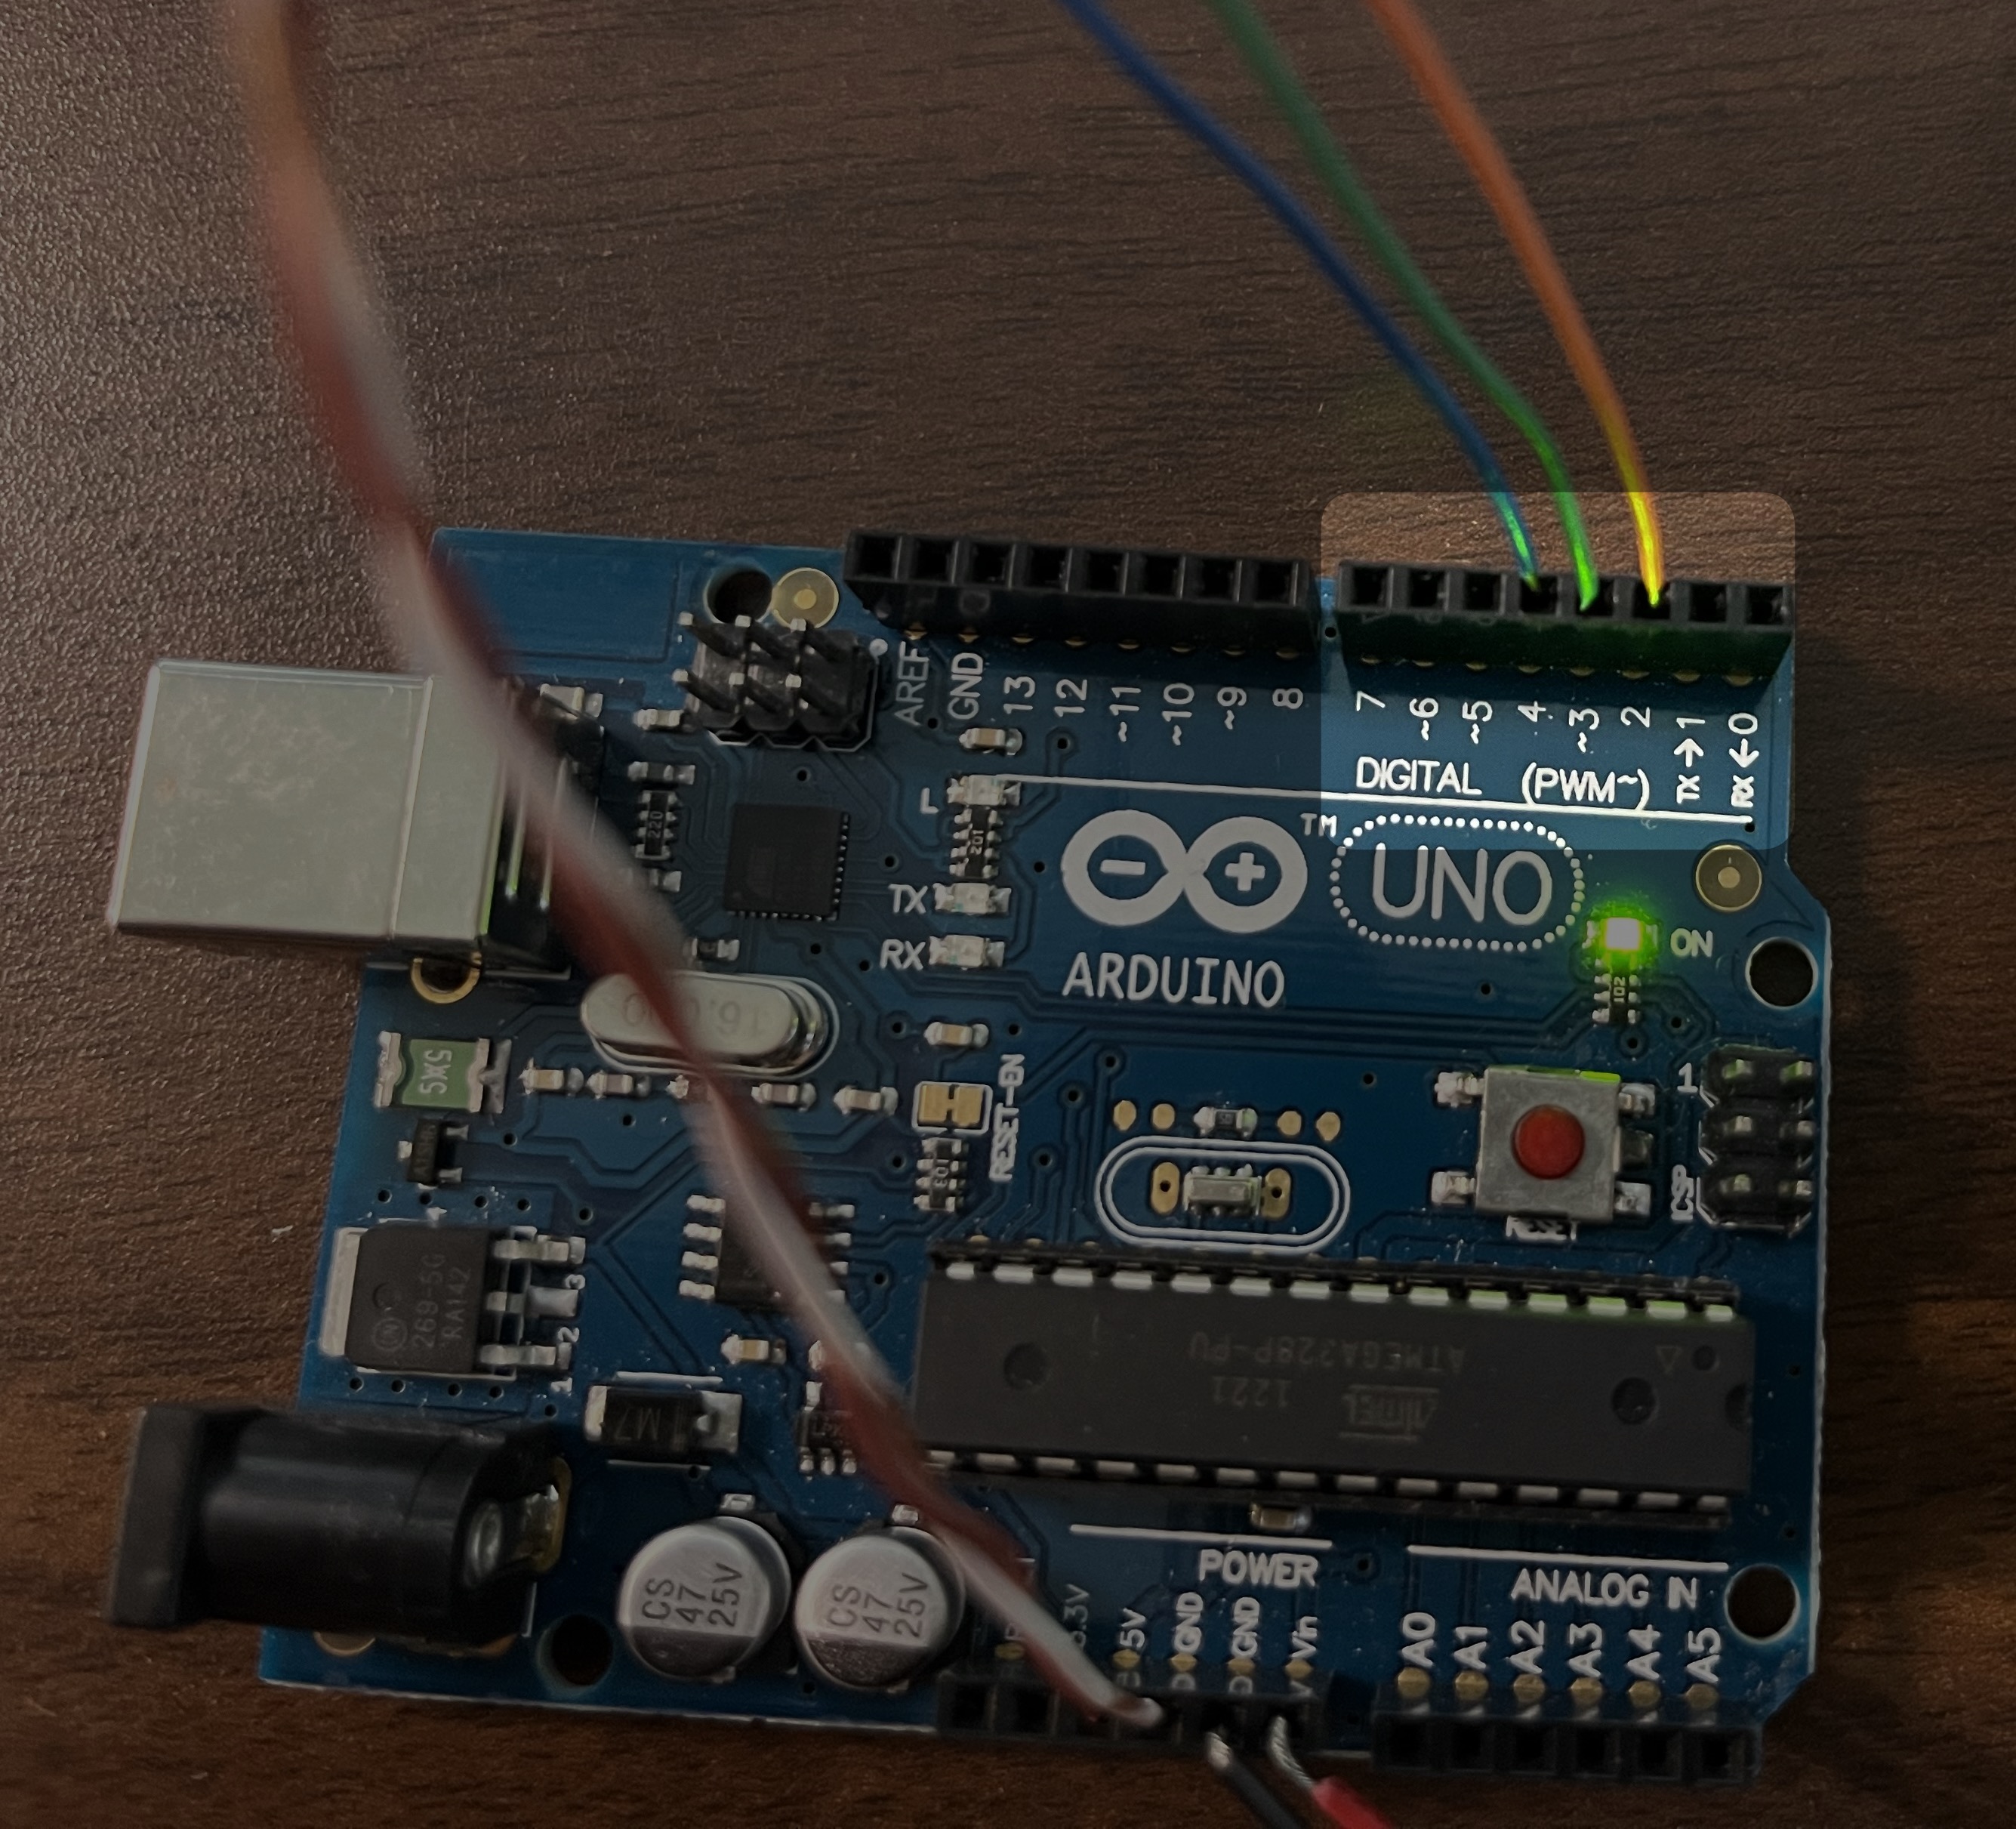
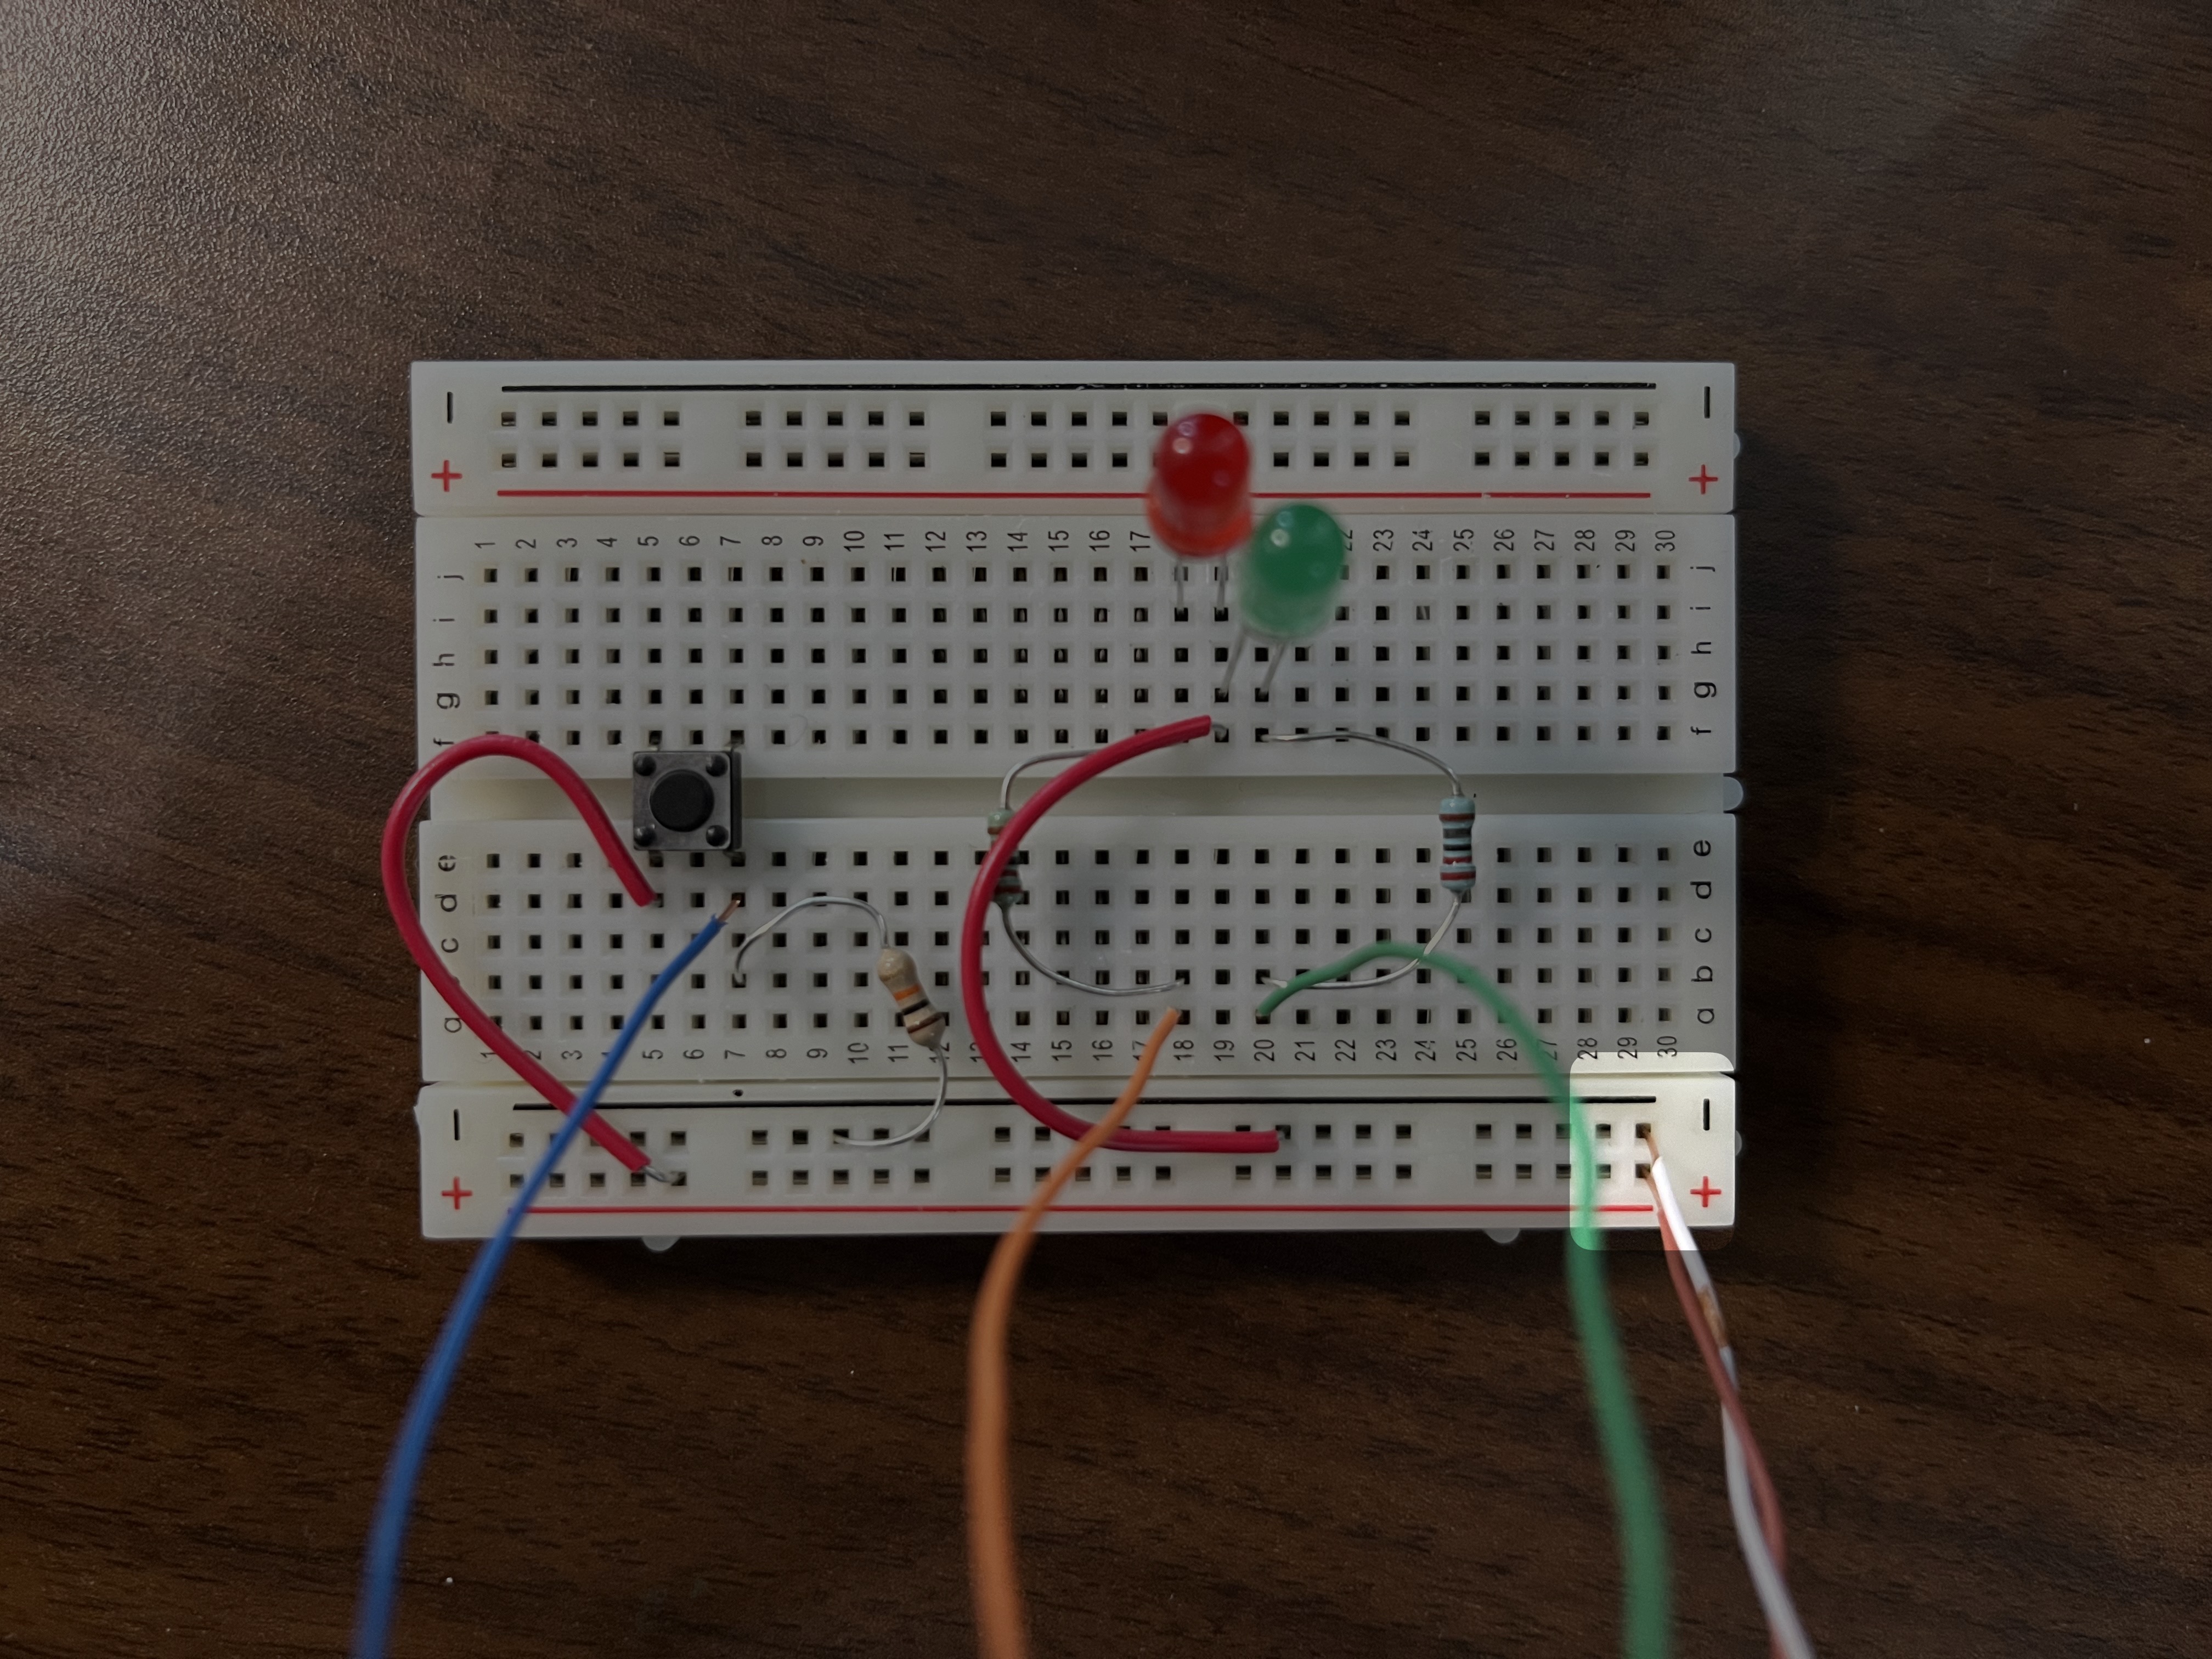
Arduino to breadboard control connections
Figure 2 for Arduino side, Figure 3 for breadboard side
- Green wire (this is the 5v for the Green LED)
- Arduino Uno: 2
- Breadboard: A-20
- Orange wire (this is the 5v for the Red LED)
- Arduino Uno: 3
- Breadboard: A-18
- Blue wire (this is the 5v return for the button)
- Arduino Uno: 4
- Breadboard: D-7
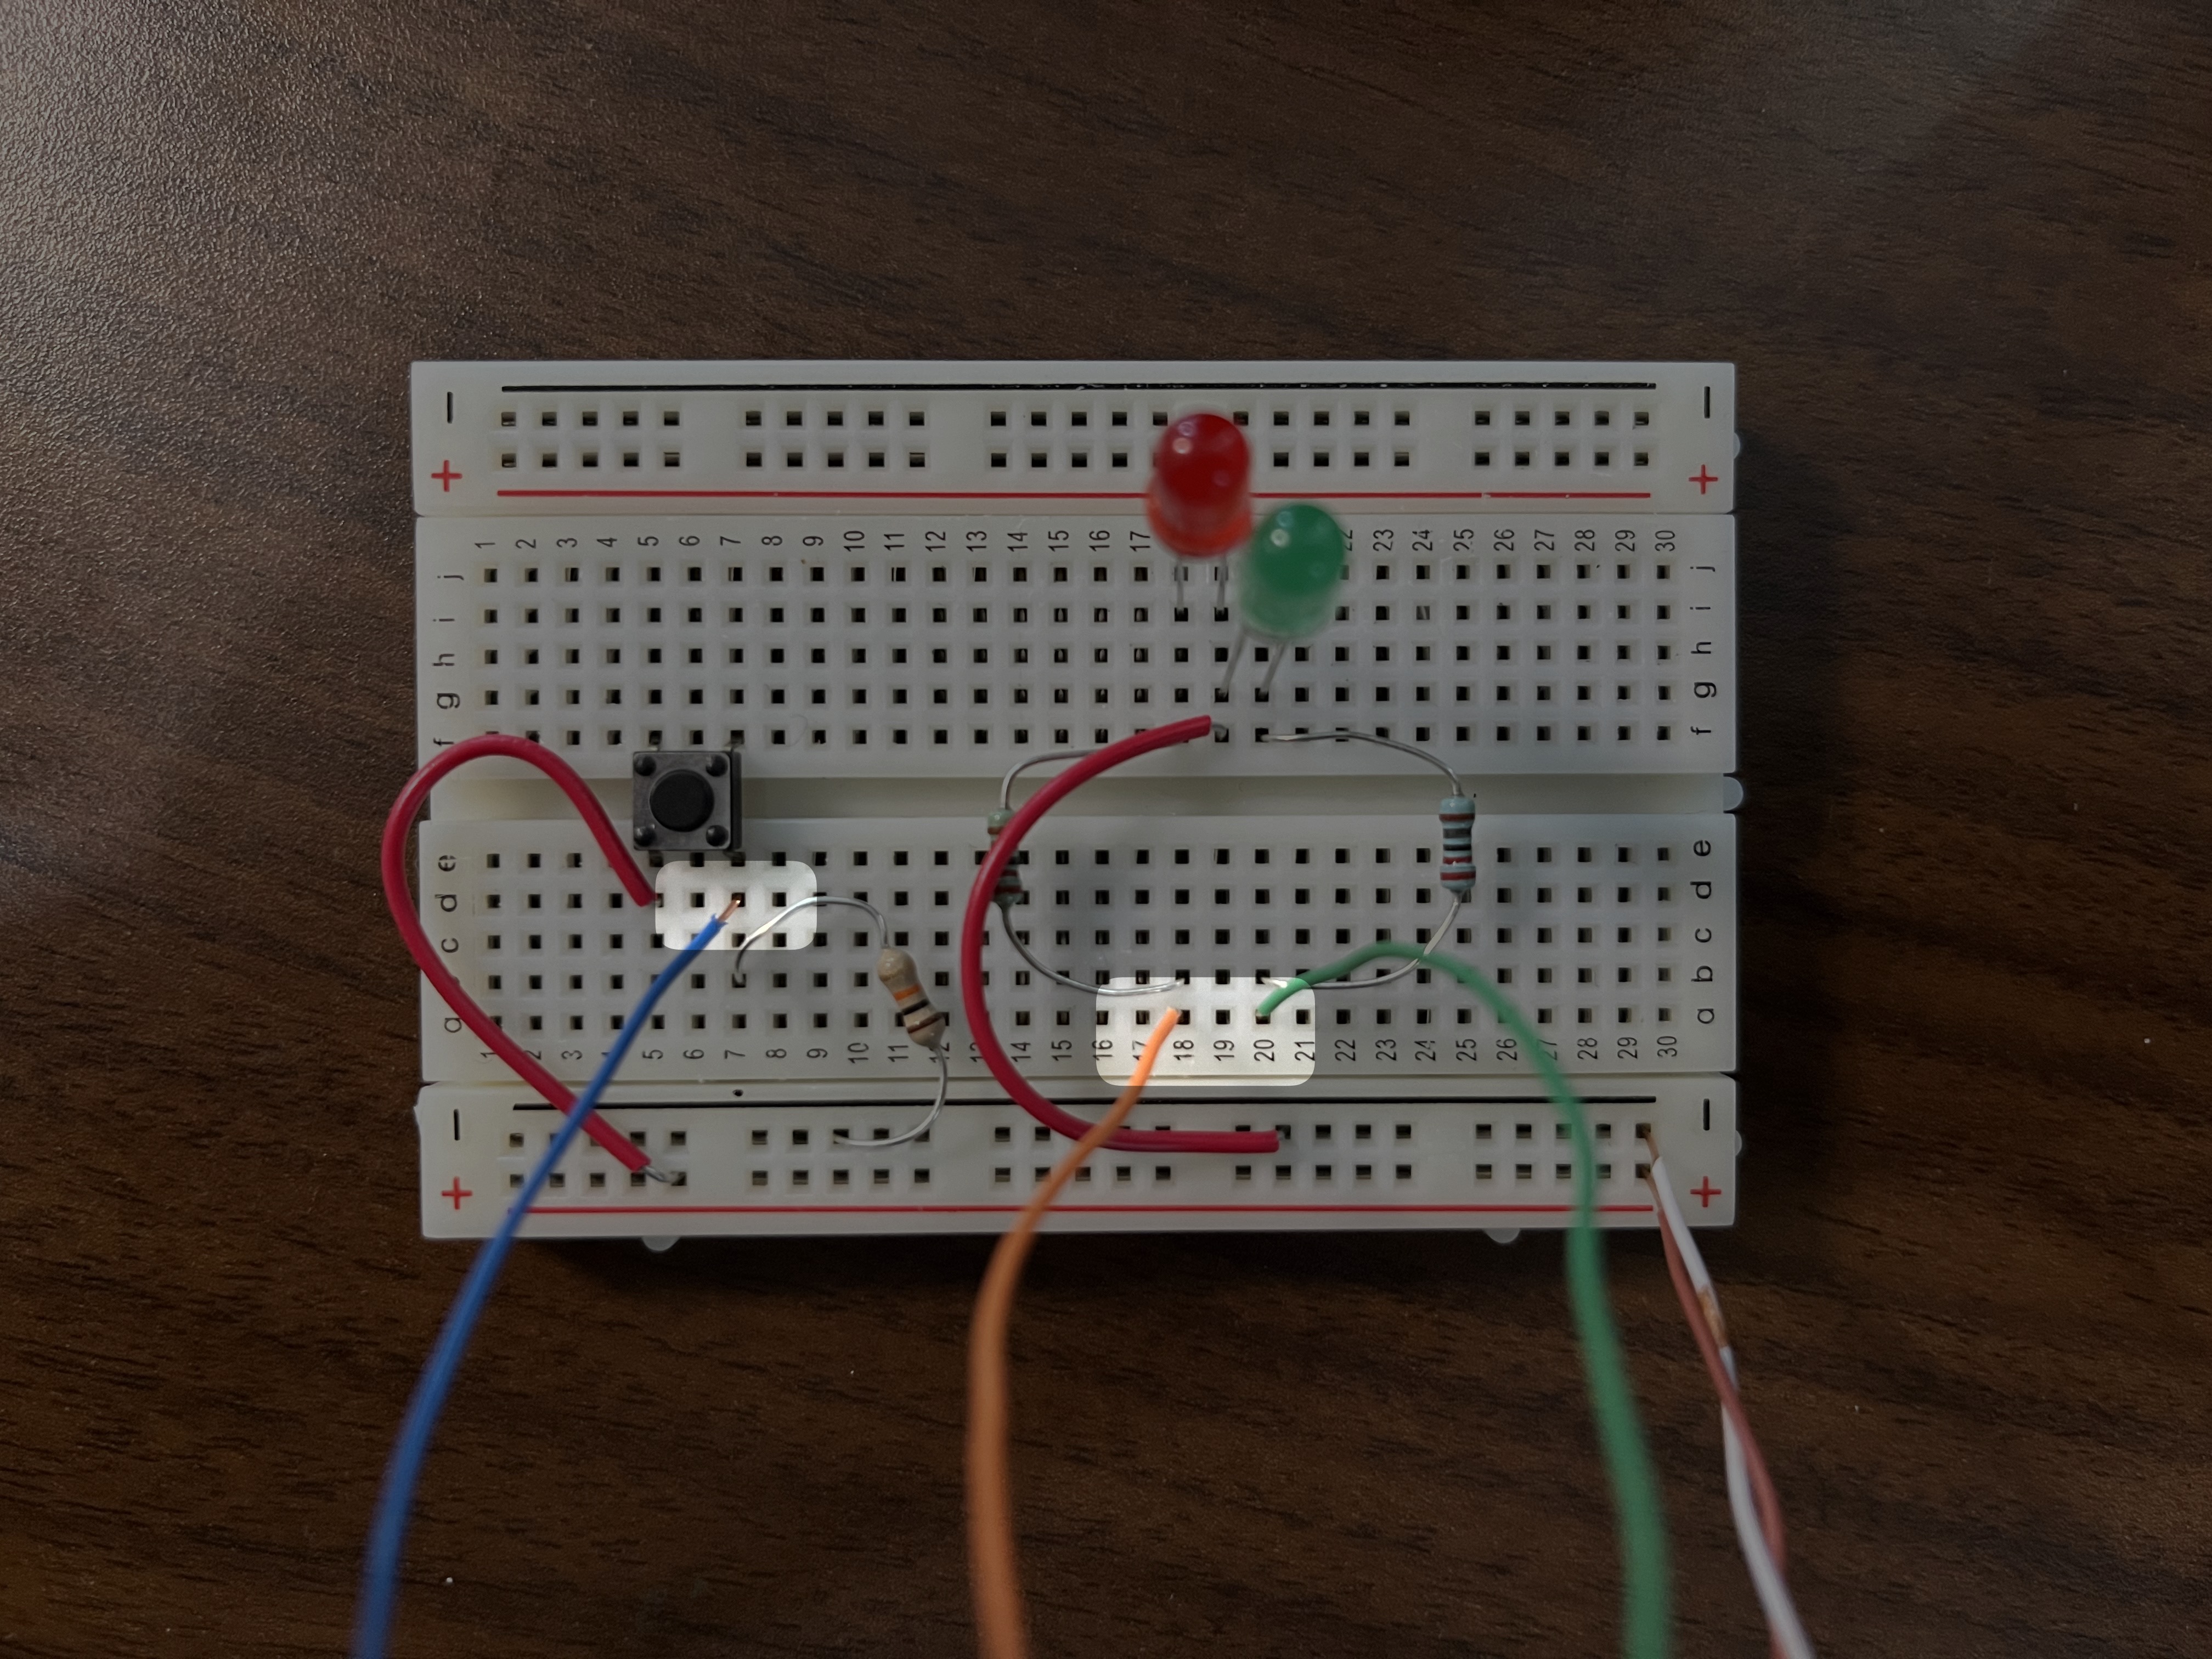
Breadboard LED connections
Figure 4 for LED wiring configuration
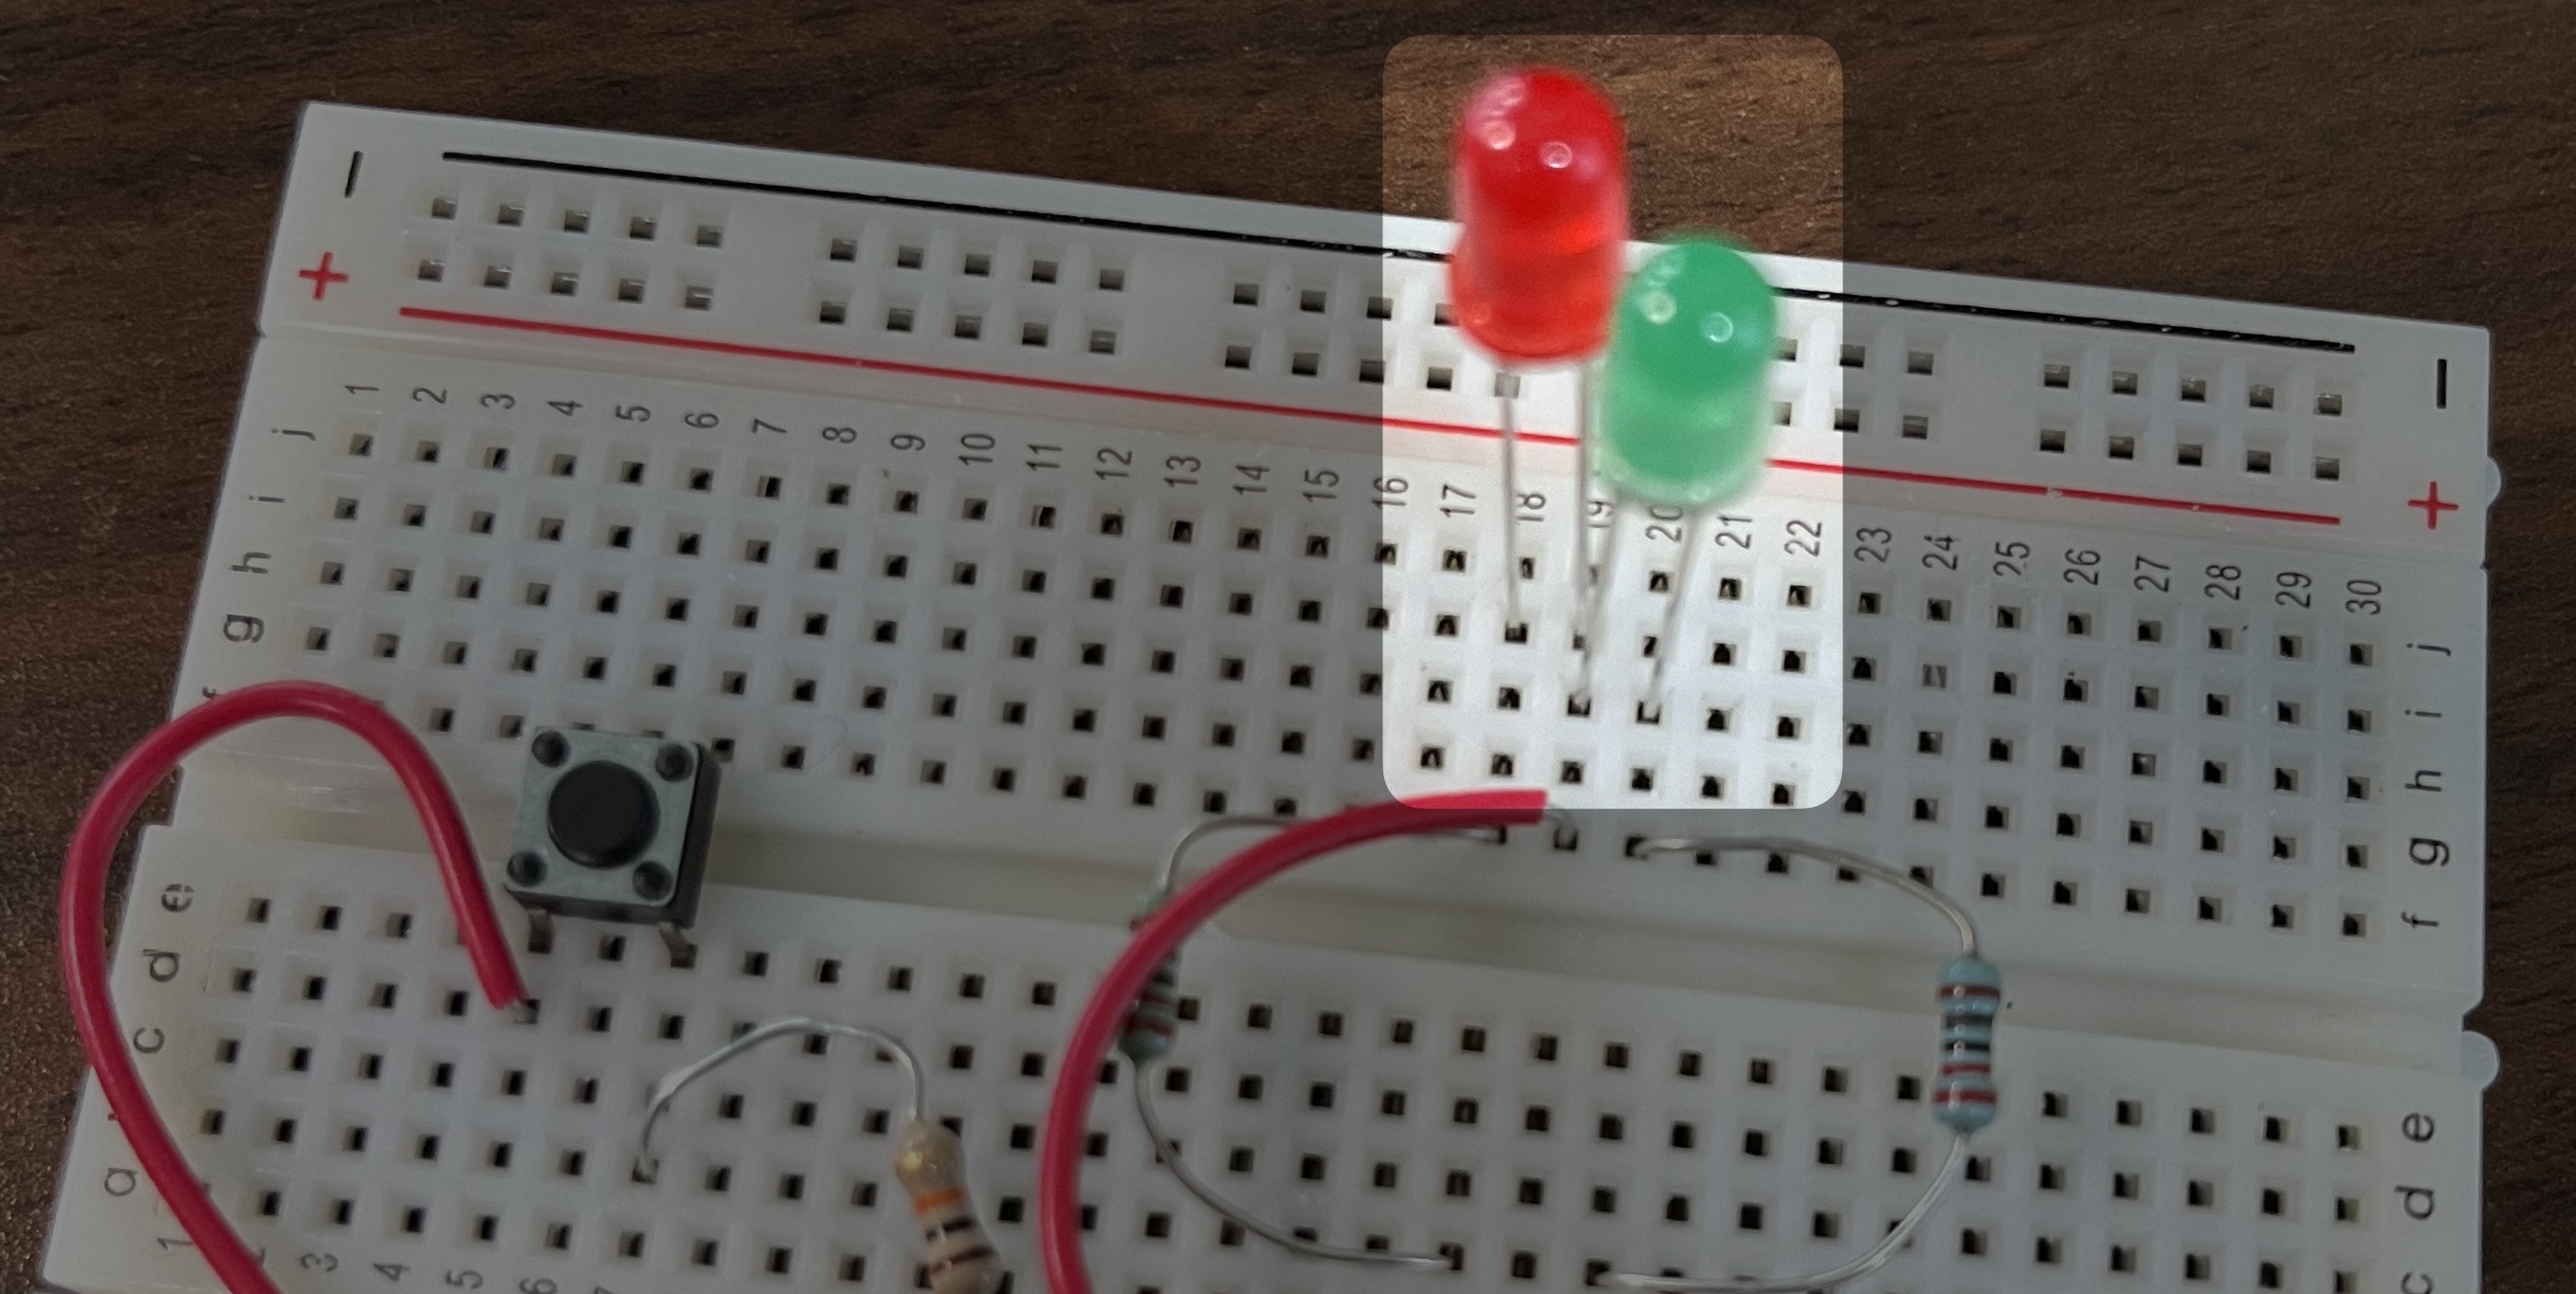
- LEDs (the anode leg is the long leg)
- Red LED
- Anode: I-18
- Cathode: I-19
- Green LED
- Anode: H-20
- Cathode: H-19
- Red LED
Power the breadboard
Figure 5 is for breadboard, Figure 6 is for Arduino
- Power to breadboard
- Brown solid
- Arduino Uno: 5V
- Positive rail (the one right before the A row)
- Brown striped
- Arduino Uno: GND (ground)
- Negative rail (the one right before the A row)
- Brown solid
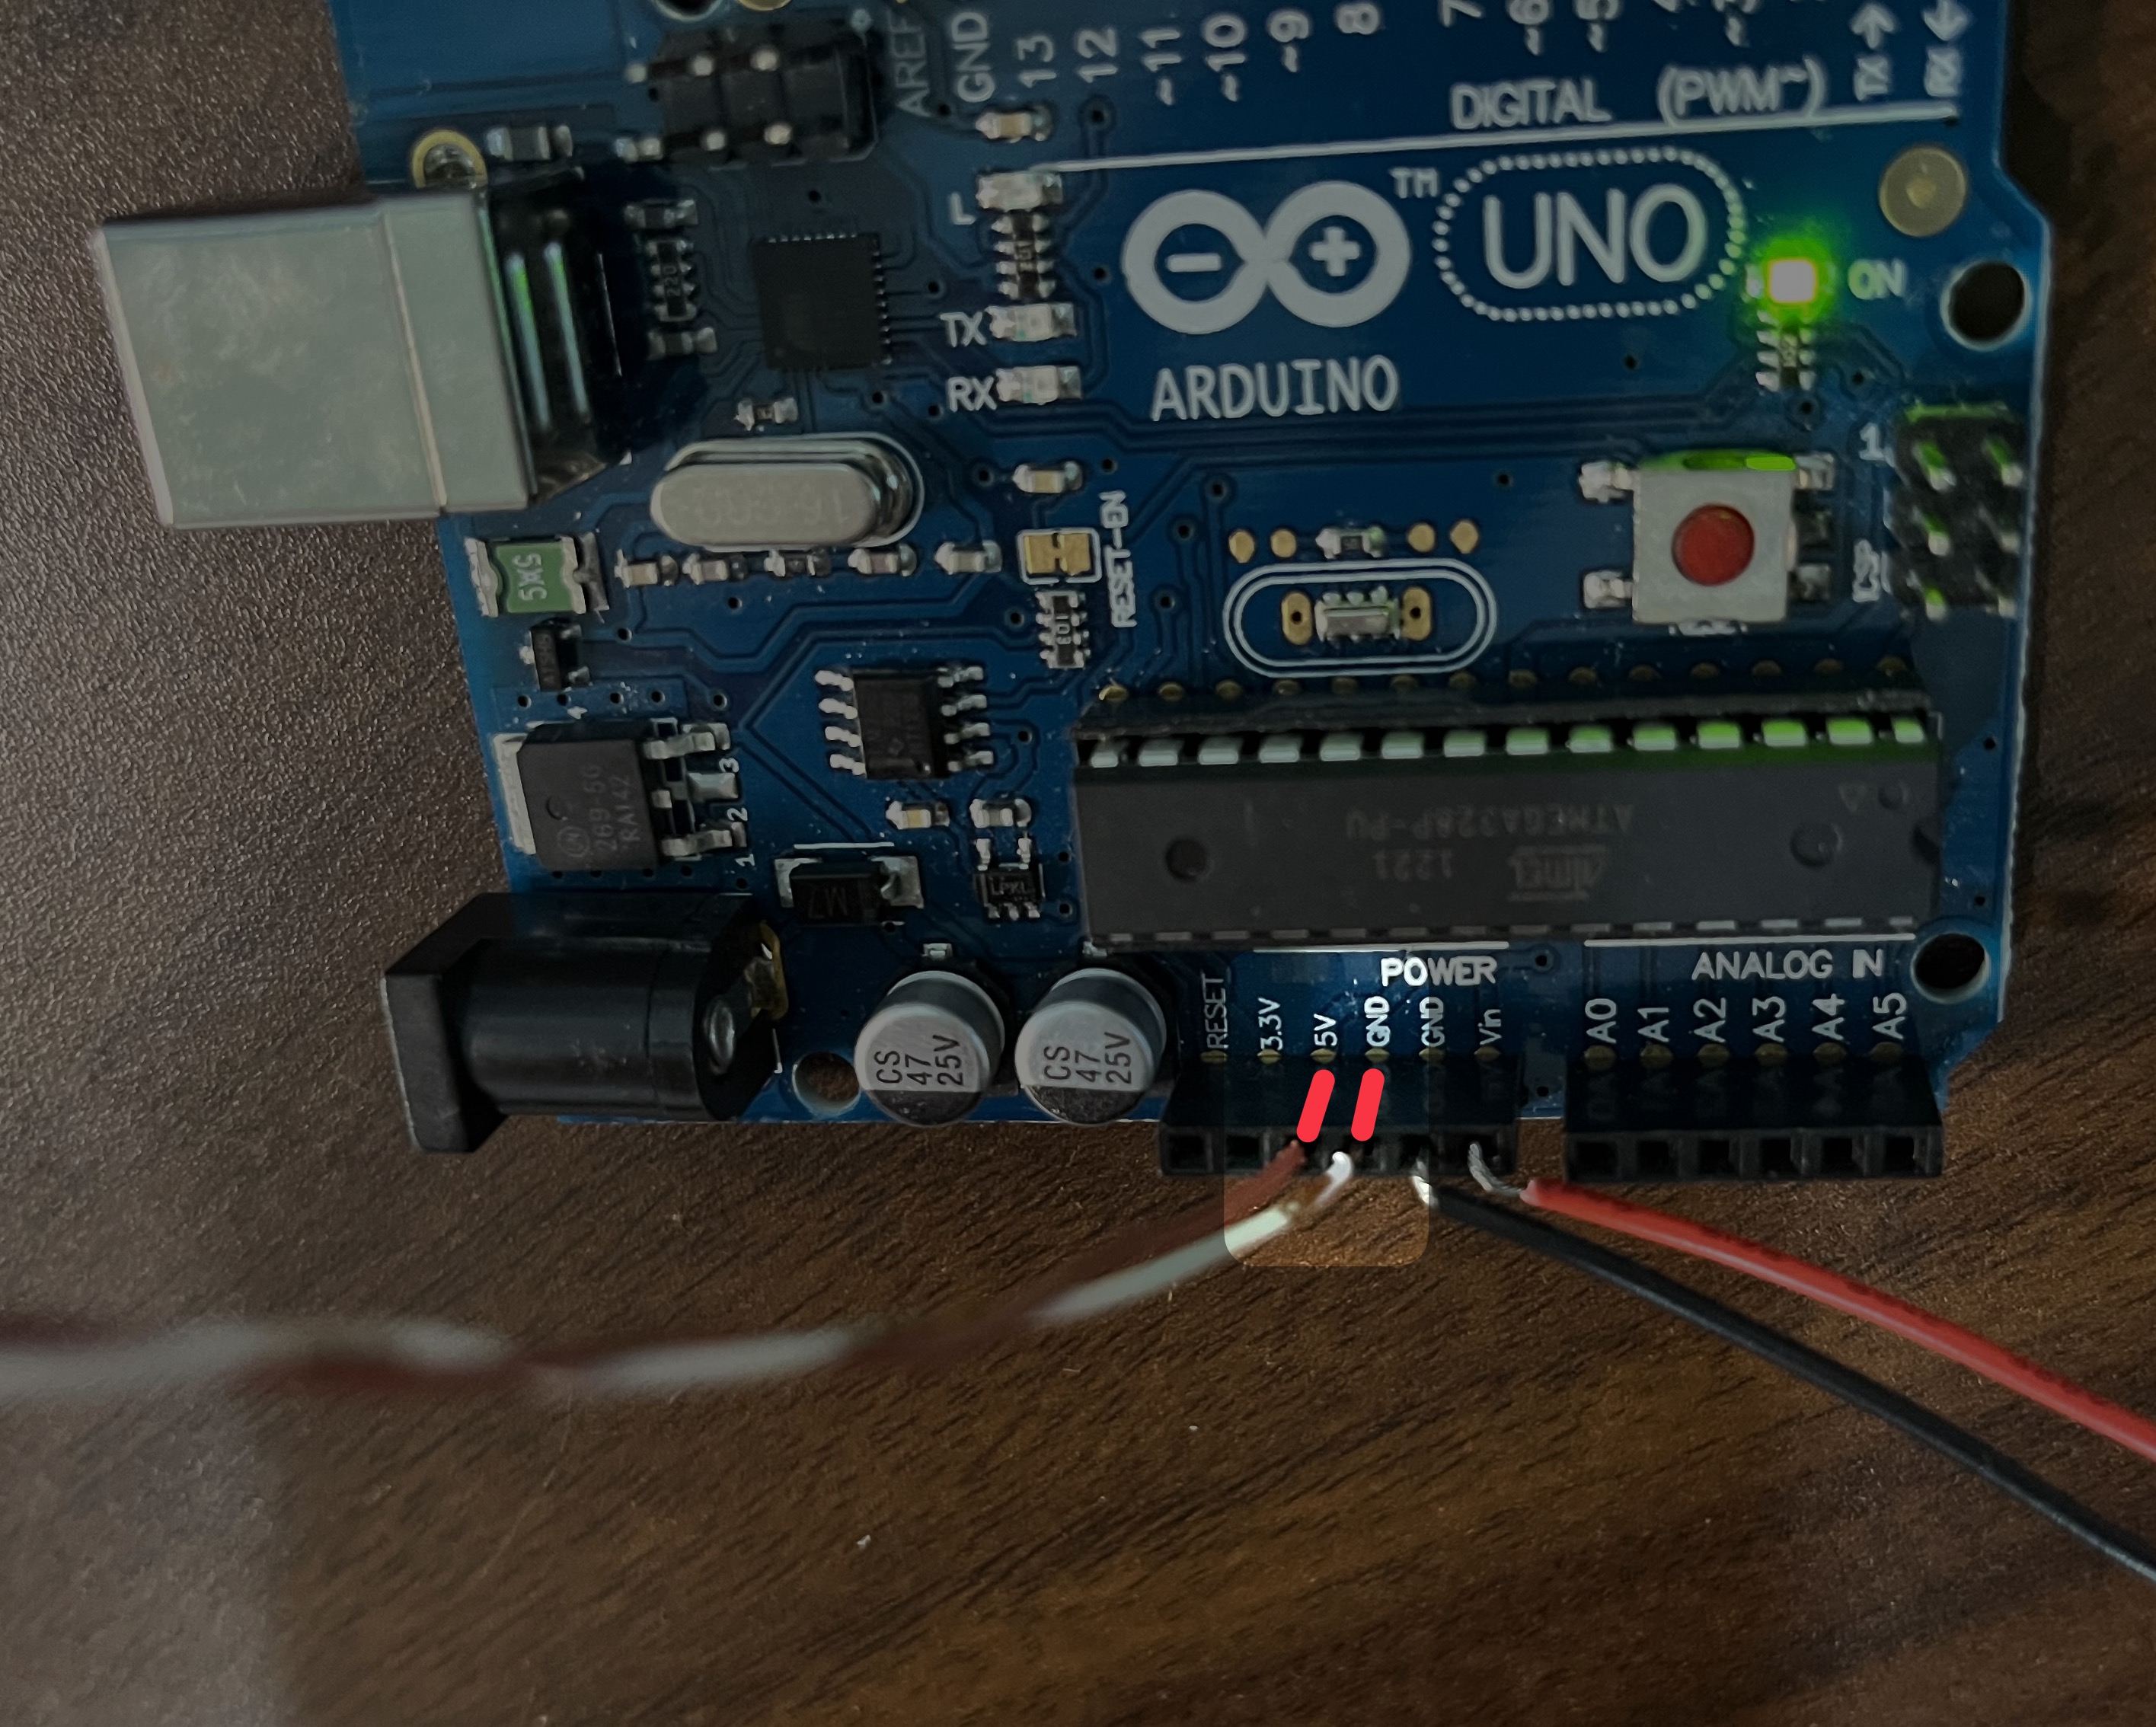
Power the Arduino
Figure 7 is for the 9v battery connection
- 9v Power
- Red
- Arduino Uno: Vin
- Black
- Arduino Uno: GND (ground)
- Red

Still stuck?
Ping me on Slack (@peterramsing)